Google

Startup

Selamat datang di webnya insinyur agak-agak tuli.
Terima kasih banyak Anda telah meluangkan waktu untuk berkunjung.

Rotating Engineer adalah titel profesi seorang insinyur teknik mesin dengan spesialisasi keahlian di bidang mesin-mesin berputar, misalnya turbin gas, kompresor sentrifugal, pompa sentrifugal, screw compressor, reciprocating engine, dan fin fan cooler. Seorang Rotating Engineer bertanggung jawab untuk membuat agar mesin-mesin itu dapat beroperasi dengan baik dan benar.

Blog ini berisi hal-hal yang berkaitan dengan profesi seorang Rotating Engineer. Isinya diambil dari pengalaman sehari-hari, berbagai sumber referensi, dan opini pribadi saya. Topik-topiknya dapat dilihat dengan meng-klik nama bulan yang ada di kotak "ARTIKEL" di sebelah kiri.

Diharapkan dari blog ini pembaca dapat mengambil manfaat yang sebanyak-banyaknya. Pertanyaan, diskusi, dan saran sangat saya harapkan. Bisa kontak ke saya di: rotatingengineer@gmail.com.

DISCLAIMER
Saya tidak bertanggung jawab atas segala akibat yang terjadi karena blog ini. Blog ini hanya berisi opini dan pengalaman pribadi saya saja.

Sekali lagi: terima kasih banyak.
wasalam


Rabu, 26 November 2014

Pak Megan,coba cek dulu selang-selang vacuum, siapa tahu ada yg kendor atau lepas.

Selasa, 07 Juni 2011

Jumat, 16 April 2010

G300 Gearbox Berdengung


Jika ada suara berdengung dari arah transmisi/gearbox tentunya kita merasa ingin tahu apa penyebabnya, khawatir akan timbul hal-hal yang tidak diinginkan dan akan mengganggu kenyamanan berkendara.


Gb.1. propeller shaft


Jika berdengung dan bergetar, kemungkinan asalnya dari propeller shaft (as kopel). Bisa jadi cross joint bermasalah ataupun perlu digrease. Kalau propeller shaft sekonyong-konyong unbalance agak tidak masuk akal, kecuali getaran ini timbul setelah ada pekerjaan melepas propeller shaft. Entah karena masangnya tidak inline (saat sebelum melepas as kopel, kasi tanda agar saat memasang tandanya tidak berputar atau berubah), ataupun balance weightnya lepas.


Grease yang direcommended oleh MB untuk G-Wagen adalah Molycote Long Life. Hitam warna greasenya, kalengnya warna hijau putih.


Jika berdengungnya timbul setelah lama dikendarai, kemungkinan transmisinya overheat/olinya keenceran.


Jika berdengungnya tanpa getaran dan terjadi setiap saat mau pindah naik ke gigi yang lebih atas, kemungkinan ini dikarenakan modulasinya tidak tepat atau pun karet-karet atau seal-seal di dalam gearbox sudah perlu diganti.


Jika berdengungnya tanpa getar dan tetap terjadi walaupun telah di posisi top gear, kemungkinan "kampas kopling" gearbox matic-nya sudah perlu diganti karena sudah mulai slip.


Demikian sekilas info.


Semoga membantu.


Have a good journey....


wasalam

Electric Turbocharger

Source:


What is Electric Boost?


Electric boost uses electrical energy to drive a compressor that provides additional air density to the engine, as opposed to using mechanical energy from the engine like traditional methods (belt driven superchargers or exhaust driven turbochargers).

Generating pressure by itself does not require much energy.
Example: The small tire pump you plug into your cigarette lighter is a compressor that uses very little electrical energy and can pump a tire up to 70 psi, but due to the devices low power draw, the small rate of air-flow coming from the straw-sized air-source requires over 10 minutes to pump a flat tire up to 35psi, and over an hour to reach 70 psi. Obviously useless if you placed this device on an engine intake as it would just create a massive restriction.

Generating air-flow by itself also does not require much energy.
Example: A radiator fan uses relatively little electrical energy, and can flow 400 to 700 CFM. However, just blowing air on something does not generate pressure, unless it there is both high air-flow rate AND air-speed. This is proven when one looks at how a "RAM-AIR" scoop works. A "RAM-AIR scoop only develops .07psi at 80 MPH, but can develop .38psi when the car is traveling at 180 MPH with a perfectly efficient ram-air scoop like the ones that are seen on Indy cars or above the hood of drag cars.

Generating air-flow AND pressure together DOES require a large amount of energy.
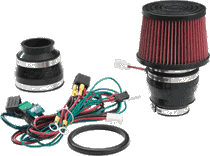
The e-RAM Axial-Flow Electric Supercharger:
The e-RAM Electric Supercharger produces on demand, the pressurizing effects greater than a perfectly designed ram-air system traveling at over 220 MPH, even when your car is standing still. To accomplish this, the e-RAM incorporates a custom high-power electric motor built specifically to our proprietary specifications, drawing over 830WATTS of electrical energy (1.2HP of electrical energy directly from the car battery) while running at a speed of 25,300rpm. We mate this up to a specially designed fully enclosed axial-flow fan unit that is desined much like a single stage of a jet turbine, incorporating tight enough tolerances between the fan blades and the internal walls to provide a high capability of air-flow with a mild pressure generating potential. When energized, the e-RAM tries to flow 800cfm into the intake, but since 2L engines only require 190 cfm at 6000 rpm, and 5.0L engines only require 470 CFM at 6000 rpm, it is the differential in airflow from what the e-RAM is trying to flow vs. what the engine is trying to take in that generates the positive pressure in the intake.
Since the e-RAM is 3.75" inside diameter, even with the motor in the center, it allows a free air-flow equivalent of a 3.1" diameter intake tube, so it does not create any restriction in the intake system when not energized during part-throttle conditions.

Centrifugal compressors are very good at generating pressure, but horribly inefficient at producing high rates of air-flow. Meanwhile, open axial-flow fans are very good at generating high rates of air-flow, but not great at generating pressure.

Generating pressure at air-flow rates required by an automotive engine takes a large amount of power. That is why "roots", "screw", and "centrifugal" compressors require between 15-20HP taken directly from the engine in order to generate just 5psi to 6psi on a small engine. Larger engines require even more HP to drive the compressor in order to generate this level of boost at the higher air-flow rates these engines require. The engine belts (or exhaust for turbos) must drive the compressor at a high enough rate of speed to generate enough air-flow so as to continually provide more air than the engine is trying to take in. Coupling the rotation of the compressor directly with the rotation of the engine allows the compressor to continue to generate pressure, even when the engine's requirement for air increases. Also, each 1psi that is added to the intake at these flow rates drastically increases the amount of power required to perform this task.

Driving a "roots", "screw", or "centrifugal" compressor electrically:
There are only two companies that we know of that manufacture "compressors" that are driven by electric motors. These are sound concepts, however, there are several drawbacks with these technologies:

One costs over $2000, and uses a "roots" style blower driven by three 6HP electric starter motors (18HP of electrical energy). This system uses belts that connect the motors to the compressor to run it at a high enough rpm to develop boost. Although almost 20psi of boost can be generated below 50 cfm, as the engine accellerates to higher rpms and requires higher air-flow, the amount of boost generated by the system drops dramatically (to roughly 5 psi at 300cfm). The 18HP of energy required to do this must come from a separate battery supply that weighs roughly 70lbs, and the compressor itself also carries a weight penalty of 25+ lbs. Since the power draw is coming directly from a separately charged battery supply, the entire system can only be used for a couple of drag runs before a waiting period must occur for the engines charging system to recharge the separate battery supply for future use. Add this to the need for a modified engine management system and fuel delivery system, and the costs, weight, and limited useability make a case for going with a traditional belt driven supercharger or exhaust driven turbocharger system.

The other system also costs over $2000 and uses a centrifugal "turbo" style compressor driven by a single 5hp electric motor. This system also uses a separate and heavy battery supply, but since it does not have as much power as the previous system, the boost level is much lower (3psi at 50cfm, and drops to less than 1psi at 200cfm, and 0psi at 300cfm). Due to the cost, complexity, and the boost provided, it too does not provide realistic performance gains that should be expected from such a costly system.

Regarding other "Electric boost" offerings like cheap plastic "turbo" looking devices or squirrel-cage ("leaf-blower" style) fans driven by a cheap electric motor:
Again, the concept of using an electrically driven "compressor" for boost is a sound concept, and again, the problem is that compressors are horrible at providing unrestricted air-flow unless they are constantly running at speeds that will also generate pressure. The "electric turbo" will have to be on all the time in order to not create restriction when not energized. This means it will have to use a low powered electric motor that won't draw any significant electrical energy so it won't overheat if used in constant duty.... thus... it won't draw enough electrical energy to generate any boost and will ultimately just restrict air-flow. Also, small plastic squirrel-cage fans cannot rotate at a high enough rate of speed to generate any pressure at flow rates required by a car engine. This is because the forces exerted on the unit if it were to rotate at a high enough speed to generate enough flow to produce pressure would cause the unit to self-destruct. It doesn't matter how powerful a motor is used with this type of cheap plastic fan.

Summary:
There is no "free lunch." Regardless of what PSI is claimed by ANY maker of electric boost technology, what hp gains are claimed, or at what rpms the "fan" is claimed to rotate, the laws of air-flow dynamics require a specific amount of power to generate psi at a given flow rate. Anyone claiming to do what we are doing [Axial-Flow (in-line) fan used to generate HP on an internal combustion engine] is IN VIOLATION OF OUR PATENT, and has no access to the motor technology required for this application.. Also, anyone else using any other style of "fan" based boost claiming ANY HP gains on a car engine without a power source of AT LEAST 680WATTS (48 amps at 13.88 Volts) is LYING, and just ripping people off.

Senin, 18 Januari 2010

Memilih jip murah meriah - Sebuah Pendapat pribadi


Assalamu'alaikum ww.
ente kayaknya mau yg oke di offroad dan onroad ya?
susah saya jawabnya. Hal ini jg dialami semua desainer jeep.
Kalau ok di offroad, maka gak enak di onroad. Sebaliknya enak di onroad, not ok di offroad.


Kalau pakai suspensi double wishbone, travel menjadi pendek, ground clearance kecil, banyak


link yg rentan kesandung kayu atau batu, dan terlalu banyak bushing yg rentan kalau kena lumpu


G-Wagen approach and departure angle


G-wagen maximum water depth


Double wishbone bushings


Double wishbone arrangement


Makanya mercy 280GE memakai solid axle, per keong, difflock, differential 4.88, chassis badak, kap mesin chamfered, dan kaca depan datar, kabin sederhana.


G-wagen front solid axle

Komentar seorang teman tentang W460 Gelandewagen:

=start=

Kalian..di jamin pasti excited terutama how that suspension and braking system works...bener2 mrk design keluar dari tradition thinking at that 80's era..(Search d Net )Cheers and pls continue making your dream comes true.saya sdh pernah pelihara CJ7, tyt FJ, Jimny sierra, Landy Defender, dan dr semua ini, Gwagen mempunyai character yg sangat berbeda, kesan ciri khan Jeep di GWagen tdk terlihat atau terasa, GWagen sangat enak handling nya terutama dari posisi argonomic dari bangku sangat nyaman senyaman SUV era skrng..driver control while driving terasa sangat dominan...sedangkan suspensi jg sangat lembut tdk seperti karakter jeep lainnya..dalam keadaan lari kencang getaran pd steer sangat minimal, serta engine power sangat memadaiIntinya GWagen memang merupakan class tersendiri diantara jeep2 tsb diatas..sementara rem sytem yg dilengkapi agak oversize booter membuat driver merasa lbh in cotrol terutama dalam kecepatan tinggi...pengoperasian transmisi 4x4 nya sangat mudah....utk long drive GWagen tdk melelahkan..pokoknya GWagen posisinya teratass dari segi kenyamanan dan mobility.Mudah2an in bs menjadi racun yg mematikan...Hehehehehhe

=end=

Apalagi ente mau yg murmer, nanti malahan jadi kemahalan karena sering gonta-ganti krn tdk puas. Yg jelas JEEP = Just Empty Every Pocket. Mendingan jangan coba-coba, langsung yang bagus walau agak mahal.

Pilihan banyak.
mulai dari CJ7(as roda mudah putus), taft short (agak keras di onroad, sempit kabin belakang. Differentialnya kalau mau ditingkatkan susah nyari yg cocok), rocky (tdk solid axle, masalah nyari differential buat naikin torsi agak susah nyari yg cocok), wilis 44 (top dah, kelemahannya hanya tdk ada difflock, dan tampias kalo ujan hehehe), cherokee (tdk ada chassis & harus pake pertamax, banyak elektronik/komputer-nya), 280GE (apa ya?yg 280GE long: under power/kurang power. Minyak rem harus rutin diganti minimal 2 thn sekali). Yg jelas ada seorang teman sekarang sdh punya 280GE Short lagi, walau sdh punya defender TDi.


G-Wagen W460 kokpit


LR Seri III kokpit


Kalau trooper diesel dan bensin ane gak bisa ngasi komentar krn blm cukup referensi.
Kalau LR Series as roda mudah putus, nyetirnya gak enak, ruang kabin tdk ergonomis dan enak. Defender as rodanya sdh lebih kuat, namun kabin tetap tdk berubah.
Yg jelas LR = Defy = Rangie = Partsnya MUAHALLL.

Sekarang ente sregnya mau jip apa dulu, nanti baru dibahas secara detil kekurangan dan kelebihannya secara lebih detil. Walau kekurangannya suatu jip yg dipilih itu banyak, namun kalo sdh sreg di hati tdk akan menjadi masalah karena itu sdh menjadi idaman, kekurangannya ketutup ama kelebihannya.

Kalo ane pilihan pribadi jatuh ke:
wilis 44/47 (utk kalo gak hujan dan gak hari panas).
280GE SWB 4x4, M/T 4speed, difflock dpn blkg.

Contoh kasus:

Utk yang tampilannya gagah: Wrangler or Cherokee?

Wrangler gak kemahalan tuh? spare partnya jarang terdengar. Gak sempit?
Ane sarankan cherokee saja.

Untuk yang bisa onroad offroad: CRV atau Escudo?

CRV dan escudo kurang paham. Tetapi CRV saja lah kalo ane pilih. Escudo agak sempit dan boros kayaknya. CRV empuk, lebih mewah, dan lebih irit kayaknya tuh. Cuma spare part agak mahal mungkin krn honda.

Tetapi, kalau memang sudah ngebet pengen punya jip yang memenuhi semua kriteria bisa buat dibawa ke mana-mana dannamun harus murah meriah, beli yang seperti ini saja dulu: mainan jip hehehehehe.... (Minta maaf, bercanda..)


G-wagens on UNIMOG

Selasa, 12 Januari 2010

Kamis, 10 Desember 2009

Mercedes G-Wagen 280GE Right Front Wheel Bearings Replacement


WARNING!!!

Gambar, foto, tata letak, dan tulisan ini adalah hak milik penulis dan tidak boleh diperbanyak tanpa seijinnya, kecuali hardcopy utk pemakaian pribadi yang bukan bertujuan komersial. Penulis tidak bertanggung jawab terhadap kecelakaan, musibah, ataupun segala macam bentuk kerugian yang dikarenakan membaca atau pun mengikuti tulisan artikel ini.

SEBELUM BEKERJA:
BACALAH BASMALLAH,
PAKAI PPE YANG BENAR,AKTIFKAN HAND BRAKE.


I. Background
During driving “ngik-ngik” sound heard from front wheel, steering wheel sagging and vibrating.


II. Manual
From various references.


III. Spare Parts
1. Outer Wheel Bearing
MB P/N = 008.981.59.05
Generic P/N = LM503349+LM503310
Qty = 1 set
Made in = SKF - Germany


2. Inner Wheel Bearing
MB P/N = 008.981.62.05
Generic P/N = LM300849+LM300811
Qty = 1 set
Made in = SKF - Germany


3. Outer Bearing Seal
MB P/N = 007.997.04.47
Generic P/N = 27725
Qty = 1 ea

4. Inner Bearing Seal
MB P/N = 007.997.03.47
Generic P/N = 22834
Qty = 1 ea

5. King Pin Bearing
MB P/N = 000.981.59.05
Generic P/N = LM11949+LM11910
Qty = 2 set
Made in = Timken - USA


6. King Pin Seal
MB P/N = 460.997.00.40
Generic P/N = N/A
Qty = 2 ea

7. King Pin Cap
MB P/N = 460.332.00.33
Generic P/N = N/A
Qty = 2 ea

8. Paper Gasket
MB P/N = 460.331.00.80
Generic P/N = N/A
Qty = 1 ea
(Replaced with Loctite Grey)


9. Swipe Seal
MB P/N = 460.331.01.80
Generic P/N = N/A
Qty = 1 ea

10. Lock washer
MB P/N = 460.994.00.12
Generic P/N = N/A
Qty = 1 ea

11. Plastic seal for wheel hub.
Made from From Baby milk formula tin cover


12. WD40

13. MB Wheel Bearing Grease
Qty = 2 tubes @150 gram


14. Shell EP Grease 800 gr (one can)


15. Silicon Nipple for Wide Neck Nurser
Qty = 1 ea


IV. Tools

o Torque wrench – Britool = 50 – 250 N.m
o Ring wrench = 13 mm, 20 mm, 22 mm
o Open wrench = 18 mm, 19 mm, 20 mm, 22 mm
o Socket Wrench = 27 mm, 24 mm, 22 mm, 20 mm, 19 mm,
o Pliers
Gambar 4.1. Some tools
o Hammer
o Chisel
o Drip
o Grease Pump
o Wooden Block
o Newspaper
o Tissue
o Cloth
o Rubber Hand gloves
o Leather Hand gloves
o Multi tools
o Long pipe
o Impact screwdriver
o Puller tracker
o Wire brush Kuningan kecil/sikat gigi bekas.
o Lampu senter
o Pembuka ban sepeda motor


V. Working Description

Sebelum kita memulai mengganti bearing roda depan, sebagai ilustrasi awal berikut ini adalah gambar tampak dalam susunan komponen roda depan Mercedes Gelandewagen 280GE:


Gambar 5.1. Susunan komponen roda depan 280 GE


Berikut adalah tahap-tahap urutan pekerjaan yang dilakukan untuk mengganti bearing roda depan Gelandewagen 280GE.


1. Persiapkan dongkrak botol dan jack stand.


Alas dongkrak dan jack stand dengan lebaran triplek agar lantai tidak rusak.


2. Kendurkan semua wheel lug bolt dengan kunci socket dan dibantu dengan pipa.


3. Posisikan dongkrak dan jack stand tepat di


bawah gardan.


Sebelum mulai mendongkrak, putar baut dongkrak searah thawaf sehingga baut itu bergerak naik sebanyak 3-4 ulir. Hal ini berguna utk memudahkan kita mengeluarkan dongkrak dari bawah garden saat selesai. Jack stand berfungsi sebagai pengaman cadangan jika dongkrak gagal berfungsi saat kita sedang bekerja. Jika ada dongkrak buaya bisa dipasang juga sbg pengaman.


4. Kebetulan G-Wagen saya dilengkapi dengan


wheel spacer.


Lumasi baut wheel spacer dengan WD40 untuk mempermudah membukanya dan mencegah ulir baut rusak/dol.


5. Pasang 2 wheel lug bolts pada posisi saling


berseberangan sekitar 180 derajat. Posiskan balok kayu sedemikian hingga saat kita memutar socket wrench wheel hub tidak ikut berbutar.


WARNING!


HATI-HATI SAAT MEMUTAR BAUT SPACER YANG KERAS JANGAN SAMPAI MENYEBABKAN DUDUKAN DONGKRAK TERPELESET.


6. Lumasi baut mounting rumah caliper


rem depan dengan WD40. Kendurkan dengan kunci ring 22 mm (atas) dan 20 mm (bawah)


7. Kendurkan securing spring clip dari brake line fitting.


Ini akan memberikan keluwesan bagi tubing rem saat kita membuka hose fitting rem dan rumah caliper.


8. Buka baut mounting plate dengan kunci ring 17 mm.


9. Dengan hati-hati, lepaskan caliper rem dari cakram.


Ikat caliper dengan tali atau kawat yang kuat.


Jangan sampai hose rem patah, peyot, atau bocor.


10. Baut kingpin atas sudah dilepas dan


cakram setelah kalipernya dilepas.


11. Buka baut positioning caliper dengan kunci ketok.


Sebelum ngetok, periksa dulu arah setelan kunci ketok, harus setelan mutar tawaf (ngendurkan).


Hati-hati jangan sampai kepala bautnya hancur/rusak.


12. Buka hub cap dengan obeng min.


Congkel secara bertahap dari 2 atau 3 sisi yang berseberangan.


13. Amati sisa grease yang ada di dalam cap


dan perhatikan bibir cap apakah masih


bagus dan bisa menutup rapat lubang hub roda.


14. Perhatikan dan ingat urutan susunan slotted hub nut. Buka hub nut dengan terlebih dulu membengkokkan lock washer (mur matahari). Putar nut searah tawaf.


15. Buka king pin atas.


16. Sebelum membuka castle nut tie rod, ganjal rod dengan jack stand. Kendurkan castle nut dan lepaskan tie rod dari arm-nya dengan pembuka tie-rod.


17. Cabut hub roda depan.


18. Keluarkan shaft roda depan dg CV-nya.


19. Kendurkan baut king pin bawah. Cabut swivel housing dengan cara menariknya ke arah serong bawah.


20. Bersihkan swivel ball. Bila perlu gunakan amplas besi halus. Terutama di bagian ball yang akan kontak dengan seal Teflon warna kuning gading (swipe seal).


21. Keluarkan outer race king pin bearing atas bawah dari swivel ball dengan menggunakan kunci soket ukuran 27 mm.


22. Bersihkan shaft roda depan. Terutama di bagian CV joint dari grease yang lama.


23. Bersihkan spline gear dan ulir nut shaft roda dari kotoran dan grease bekas. Gunakan sikat gigi bekas atau wire brush kuningan. Periksa kalau ada yang cacat. Setelah bersih lumasi dengan WD40 atau grease baru atau oli baru.


24. Bersihkan spline gear shaft roda dari kotoran dan grease bekas. Periksa kalau ada yang cacat. Setelah bersih lumasi dengan WD40 atau grease baru atau oli baru.


25. Bersihkan permukaan shaft roda yang kontak dengan cardan oil sealdari kotoran dan grease bekas. Periksa kalau ada yang cacat atau gores. Setelah bersih lumasi dengan WD40 atau grease baru atau oli baru.


26. Bersihkan swivel housing terutama di: bearing seat, seal bearing seat, kingpin bearing seat, lubang baut, grease fill hole, mating surface, dan daerah penampungan grease.


27. Gunakan balok kayu untuk memasang outer wheel bearing outer race ke dalam wheel hub housing. Ketok balok kayu dengan extension bar ½ inch atau martil.


28. Oleskan MB bearing grease secara merata sampai ke sela-sela terdalam sambil diputar-putar, namun jangan berlebihan greasenya.


29.


30. Oleskan Loctite di seal cap agar kedap air, kemudian setelah itu, pasang seal kingpin bearing atas bawah, masukkan outer race king pin bearing. Gunakan rubber mallet/bronze hammer, atau kombinasi antara palu besi dengan balok kayu. Sambil diketok amati bibir outer race masuk sama rata ke swivel ball.


31. Pasang inner bearing seal dengan menggunakan outer race outer bearing sebagai toolnya. Lapisi inner seal dengan kain atau kertas tisu agar tidak cacat dan kotoran dari balok kayu tidak masuk ke seal.


32. Masukkan outer seal ke wheel hub housing dengan menggunakan kepala mandrel. Hati-hati jangan sampai membuat lecet atau rusak karet seal.


33. Oleskan MB bearing grease secara merata sampai ke sela-sela terdalam sambil diputar-putar, namun jangan berlebihan greasenya. Masukkan grease ke rongga/celah antara inner dan outer wheel bearing.


34. Bersihkan CV dari bearing yang lama, kemudian lumasi CV dengan MB grease sampai ke celah-celah terdalam. Masukkan shaft roda depan sambil diputar sampai terasa gear spline-nya masuk ke pasangannya di differensial. Pasang king pin bearing cap.


35. Pasang swivel housing ke cardan. Hati-hati jangan sampai kingpin bearing cap bergeser, sambil dimasukkan kingpin. Saya bukan superman, jadi perlu bantuan dongkrak buaya untuk memposisikan swivel housing-kingpin atas-kingpin bawah.


36. Pasang karet swivel. Arah chamver-nya jangan sampai terbalik. Chamver harus searah dengan bulatan swivel ball.


37. Belahan ring swivel yang berlubang-lubang posisikan di posisi pukul 12. Belahan ring swivel yang diameternya terkecil posisikan di pukul 6. Kencangkan bautnya sampai 20-25 N.m


1. outer gasket/ring swivel terluar
2. gasket kertas (saya ganti dengan Loctite)


3. seal karet kuning/ball gasket (full)
4. Inner gasket holder


38. Saya gunakan karet dot botol susu anak saya sebagai pengganti rubber cap seal tie rod.


39. Sebelum memasang baut tie rod ke king pin arm, 2 buah baut mounting steering stabilizer/hock absorber harus dilepas dulu agar tie rod arm (warna orange) bisa diangkat sedikit sehingga baut tie rod bisa masuk ke king pin arm. 20-25 N.m. Castle nut 90-100 N.m.


40. Oleskan Loctite sealant di kingpin dan swivel ring.


41. Kencangkan baut kingpin 170-190 N.m.


42. Tambahkan grease ke swivel ball melalui plug sebanyak 800 gram.


43. Masukkan slotted nut ke ulir shaft roda depan. Permukaan slotted nut yang flat/rata menghadap ke luar (pemasang), permukaan yang tirus menghadap ke dalam.Kencangkan slotted nut sampai 200 N.m sambil hub diputar. Ini agar masuknya benar. Kemudian kendurkan slotted nut. Kemudian kencangkan sekencang-kencangnya dengan tangan biasa. Setelah itu, kendurkan sebanyak 1/8 – 1/6 putaran. Cek bearing endplay = 0.02 mm – 0.04 mm.


44. Masukkan lock tab washer ke shaft roda. Alat bantu yang digunakan adalah kunci soket dan martil.


45. Masukkan lock tab washer sampai menyentuh slotted nut secara merata dan rapat.


46. Pasang slotted nut terluar samapai 200 N.m. Bengkokkan tab ke dalam slot dari nut.


47. Beri Loctite sealant agar air tidak masuk ke dalam cap.


48. Pasang wheel cap dengan bantuan balok kayu yang dipukul pakai martil agar masuknya rata dan wheel cap tidak rusak terpukul martil.


49. Pasang kembali cakram rem. Jangan lupa memasang kembali securing bolt cakram dengan obeng ketok. dan caliper rem depan. Hati-hati selang minyak rem jangan sampai bocor atau rusak.


50. Kencangkan mounting bolt caliper rem dengan torsi berikut:
250-280 N.m = M16x1.5190-220 N.m = M14x1.5


51. Pasang kembali mounting plate selang rem dengan cara melepas 2 buah baut kingpin. Setelah mounting plate terpasang, kencangkan kembali baut kingpin sampai 170-190 N.m.


52. Pasang kembali klip spring dengan diketok pakai extension wrench.


53. Pasang kembali wheel hub spacer dan bautnya. Torque sampai 185 kg.m. Kencangkan secara berselang seling/loncat 2 baut.


54. Pasang roda ke rotor/hub roda depan.


55. Pasang baut roda, kencangkan dengan tangan Yakinkan permukaan roda terikat dengan rata.


56. Turunkan dongkrak. Torque baut roda bertahap sampai 185 N.m secara bersilangan/loncat 2 baut.


VI. Finding Result


Gambar 6.1.
Broken outer wheel bearing @ rollers


Gambar 6.2.Broken roller and outer bearing seal spring ring


Gambar 6.3.Gejala berkarat di wheel cap. Menandakan adanya air.


Gambar 6.4. Broken CV Rubber Boot


Gambar 6.5.Pitting at outer bearing inner race. Bisa jadi diakibatkan karena fatig atau pun karena greasenya mengandung water.


Gambar 6.6.Pitting at outer bearing outer race. Bisa jadi diakibatkan karena fatig atau pun karena greasenya mengandung water.


Gambar 6.7.High temp-overload-lack of lubrication sign at inner bearing outer race.


Gambar 6.8.Odd pattern at inner bearing inner race. Kemungkinan terbentuk saat outer bearing gagal dan terjadi getaran di shaft roda.


Gambar 6.9. Replaced parts


VII. Discussion
Diperlukan kewaspadaan dan cukup waktu untuk melakukan trial run 280GE ini agar kita benar-benar yakin tidak ada lagi kerusakan yang kritikal saat dipakai.
Sejarah riwayat pemakaian (maintenance, kerusakan, dan parts replacement) mobil tidak diketahui karena ini mobil bekas yang telah berumur 20 tahun dan telah berpindah-pindah tangan lebih dari 2 pemilik menyebabkan butuh waktu yang agak panjang untuk trial run. Alhamdulillah selama trial run bisa ketahuan ada getaran dan bunyi aneh dari roda depan.

VIII. Future Advice
Lengkapi tools: mallet karet, drift kuningan, jaw socket untuk slotted nut, mandrel untuk memasang outer bearing seal, dial gage untuk cek endplay. Harus rutin cek grease di roda. Serta steering absorber harus diganti agar saat nyetir tidak terasa getar saat melewati jalan berbatu dan agar komponen steering awet.